I was trying to drop a user from SSIDB database and I encountered the following error -
The database principal has granted or denied permission to catalog objects in the database and cannot be dropped. The transaction ended in the trigger. The batch has been aborted. (Microsoft SQL Server, Error: 27226)
I ran the following query to find the permission of the user I am trying to drop
use SSISDB
GO
SELECT TOP 1000 [object_type]
,[object_id]
,[principal_id]
,[permission_type]
,[is_deny]
,[grantor_id]
, 'EXEC catalog.revoke_permission @object_type=' + CAST([object_type] AS VARCHAR)
+ ', @object_id=' + CAST([object_id] AS VARCHAR)
+ ', @principal_id=' + CAST(principal_id AS VARCHAR)
+ ', @permission_type=' + CAST(permission_type AS VARCHAR) [execute this]
FROM [SSISDB].[catalog].[explicit_object_permissions]
WHERE principal_id = USER_ID('usertodrop')
Then copied the contents of the [execute this] column in a new query window and executed it against the SSISDB database which revokes the permission .
Then I was able to drop the user.
Showing posts with label SSIS. Show all posts
Showing posts with label SSIS. Show all posts
Friday, February 19, 2016
Thursday, February 18, 2016
Error logging in SSIS
A very cool feature where the error from SSIS can be logged with few steps. Right click on the control flow canvas and select Logging.
In the Add a new log section you can select a Provider type. I have selected the SSIS log provider for SQL Server since I want to log the error to the database. The ErrorLogConn is the Environment variable that I have created in Project level. ( This points to the msdb database where I want to log the error)

In the following screen you get to select the events that you want to log for. I have selected only the following events keeping in mind that selecting all events might fill up the database soon.
OnError
OnTaskFailed
OnWarning
 SELECT TOP (100) PERCENT PKG.PackageName, PKG.starttime AS PackageStartTime, LG.source AS TaskName, LG.starttime AS StartTime, LG.endtime AS EndTime,
LG.message
FROM dbo.sysssislog AS LG INNER JOIN
(SELECT LG1.executionid, LG1.source AS PackageName, LG1.starttime
FROM dbo.sysssislog AS LG1 INNER JOIN
(SELECT source, MAX(starttime) AS starttime
FROM dbo.sysssislog
WHERE (event = 'PackageStart')
GROUP BY source
HAVING (MAX(starttime) > DATEADD(dd, -1, GETDATE()))) AS CUR ON CUR.source = LG1.source AND CUR.starttime = LG1.starttime
WHERE (LG1.event = 'PackageStart')) AS PKG ON LG.executionid = PKG.executionid
WHERE (LG.event IN ('OnError'))
ORDER BY PackageStartTime DESC, StartTime
In the Add a new log section you can select a Provider type. I have selected the SSIS log provider for SQL Server since I want to log the error to the database. The ErrorLogConn is the Environment variable that I have created in Project level. ( This points to the msdb database where I want to log the error)

In the following screen you get to select the events that you want to log for. I have selected only the following events keeping in mind that selecting all events might fill up the database soon.
OnError
OnTaskFailed
OnWarning

Once you hit OK an save the project, deploy it and that's all.
You can run the following to see the last error
(The above query was taken from the blog http://dataqueen.unlimitedviz.com/2012/08/logging-in-ssis/ - an awesome blog!)
Monday, March 9, 2015

This is how I achieved it -
1. The list of database connections ( the result returned by the Execute SQL task : Retrieve hospital list ) was assigned to the user variable @HospitalList ( type Object) and the list was assigned as the enumerator for the Foreach loop show in the following diagram.

The Script editor had the following code.
public void Main()
{
// TODO: Add your code here
bool failure = false;
bool fireAgain = true;
foreach (var ConnMgr in Dts.Connections)
{
Dts.Events.FireInformation(1, "", String.Format("ConnectionManager='{0}', ConnectionString='{1}'",
ConnMgr.Name, ConnMgr.ConnectionString), "", 0, ref fireAgain);
try
{
ConnMgr.AcquireConnection(null);
Dts.Events.FireInformation(1, "", String.Format("Connection acquired successfully on '{0}'",
ConnMgr.Name), "", 0, ref fireAgain);
}
catch (Exception ex)
{
Dts.Events.FireError(-1, "", String.Format("Failed to acquire connection to '{0}'. Error Message='{1}'",
ConnMgr.Name, ex.Message),
"", 0);
failure = true;
}
}
if (failure)
Dts.TaskResult = (int)ScriptResults.Failure;
else
Dts.TaskResult = (int)ScriptResults.Success;
}
}
}
The Precedence Constraint Editor for the success flow was set as follows

The Precedence Constraint Editor for the failure was set as follows.

Note: The connection string of the database was dynamically created . The connection string was stored in a database table which was read by the Execute SQL task : Retrieve hospital list
Wednesday, February 11, 2015
How do I use parameters in an SSIS ADO NET source?
How do I use parameters in an SSIS ADO NET source -
Question
When I use SQL Command Text, there is a Parameters button in OLE DB Source. But now I want to use ADO NET Source in Data Flow and I cannot find such button in ADO NET source. How do I pass parameters to an ADO NET Source?
Answer
You can use variables together with Expression to pass the parameters:
1) Switch to Control Flow, click the Data Flow Task.
2) In the Properties window, notice a property called Expression and a small button next to it. Click the button to open the Expression Editor.
3) In the Property list, select [The name of ADO NET Source].[SqlComamnd] and click the button under expression column to open Expression Builder.
4) Write the query with variable names and click the Evaluate Expression button to test the expression. For example:
"SELECT * FROM EMPLOYEES WHERE FNAME='" + @[User::FName] + "'"
"SELECT * FROM EMPLOYEES WHERE FNAME='" + @[User::FName] + "'"
Friday, February 3, 2012
error:[OLE DB Source [1]] Error: A rowset based on the SQL command was not returned by the OLE DB provider.
I ran into the following error when calling a stored procedure from SSIS. The stored proedure dumps the SELECT query result into a table variable and I was doing a final SELECT from the table variable.
[OLE DB Source [1]] Error: A rowset based on the SQL command was not returned by the OLE DB provider.
The error was eliminated after putting SET NOCOUNT ON in the begining of the stored procedure
[OLE DB Source [1]] Error: A rowset based on the SQL command was not returned by the OLE DB provider.
The error was eliminated after putting SET NOCOUNT ON in the begining of the stored procedure
Tuesday, January 31, 2012
SSIS Error: Error: ForEach Variable Mapping number n to variable "User:: n1 " cannot be applied.
The exact error I got was
Error: ForEach Variable Mapping number 2 to variable "User::i_HospitalCode" cannot be applied.
I spent almost 2 hours trying to find out what the problem was. It was the problem in the data type. I was declaring the data type of variable User::i_HospitalCode as string where as the resultset ( returned by the stored procedure) was integer.
I changed the data type of the variable User::i_HospitalCode in the variable declaration window and it worked!
Wednesday, December 21, 2011
Error: SSIS package : A rowset based on the SQL command was not returned by the OLE DB provider
I am trying to use a stored procedure in the OLE DB source, I am using the SQL Command for the Data Access mode. It returns values when using the preview but when I test the SSIS package I receive the error, "A rowset based on the SQL command was not returned by the OLE DB provider
Solution
I just had to add SET NOCOUNT ON in the begining of the stored procedure that I was using.
Solution
I just had to add SET NOCOUNT ON in the begining of the stored procedure that I was using.
Thursday, July 14, 2011
Searching for a string in the filename and moving, renaming it using SSIS
I had to create a project ot navigate through a folder and look for a file that has EXE string in the file name ( not as the extension) of the file. e.g. NormanEXE1234.txt. Then once the file was found it had to be copied to the archive folder and the origianl file ahd to be reamed as hcfsnorman.txt.
After almost two days of trying to figure out how to do it, I have completed the task successfully. There were not much write up on this on the internet to my suprise. I could find tutorials only on coppying and moving of the file but not searching for a particular string to match in the filename. Finally, I thought I would put this steps together and here it is....
The following screen( on the left of the screen) shows the different variables declaration. The control flow has two file system task One for archiving the files and the other for renaming the original file.Both the tasks are encapsulated in a For each loop container as we will be navigating through all the files in the folder to find the match for the files we want to move to the archive folder.
The variables userd:
![]()
Double click on the For each loop container and fill up as follows. The filespec property of the expression of the container should be the filename since we will be searching for the filenames that has EXE string in it.
![]()
![]() Double click the FileSystem Task editor and change the destination path variable, the source connection and the operation. The source connection called ExtendedServices is a flat file connection.
Double click the FileSystem Task editor and change the destination path variable, the source connection and the operation. The source connection called ExtendedServices is a flat file connection.
![]()
The flat file connection is created as follows where in file name we have file://sanftps/FTPUsers/354norman/ToHCFS/*EXE*.txt
![]()
Next, the most important part of the project is to define building the expression for the connection string of the file connection to look for a certain string ( EXE - in this case) in the source folder.
Click on the (..) next to the expression in the proeprty page of the connection manager.
Select the property Conenction string and then click on the expression to open up a screen as shown in the picture below.
![]()
This is where we specify the expression for the connection string.
FINDSTRING( @[User::vFileSourcePath] + @[User::vFileName] , @[User::vFileSpec] ,1) > 0? @[User::vFileSourcePath] + @[User::vFileName] :""
Basically, we are using FINDSTRING string function and tying it to the Boolean Operand to build the connection string. That's all.
After almost two days of trying to figure out how to do it, I have completed the task successfully. There were not much write up on this on the internet to my suprise. I could find tutorials only on coppying and moving of the file but not searching for a particular string to match in the filename. Finally, I thought I would put this steps together and here it is....
The following screen( on the left of the screen) shows the different variables declaration. The control flow has two file system task One for archiving the files and the other for renaming the original file.Both the tasks are encapsulated in a For each loop container as we will be navigating through all the files in the folder to find the match for the files we want to move to the archive folder.
The variables userd:
- vArchiveFile : Stores the path where the file will be moved to archive ( destination folder)
- vFileName : Name of the file ( source fie name)
- vFileSourcePath : The path of the original file where it is found
- vFilsSpec : The string to search in the filename
- vWorkingFileName : The name of the file to be renamed

Double click on the For each loop container and fill up as follows. The filespec property of the expression of the container should be the filename since we will be searching for the filenames that has EXE string in it.


The flat file connection is created as follows where in file name we have file://sanftps/FTPUsers/354norman/ToHCFS/*EXE*.txt

Next, the most important part of the project is to define building the expression for the connection string of the file connection to look for a certain string ( EXE - in this case) in the source folder.
Click on the (..) next to the expression in the proeprty page of the connection manager.
Select the property Conenction string and then click on the expression to open up a screen as shown in the picture below.

This is where we specify the expression for the connection string.
FINDSTRING( @[User::vFileSourcePath] + @[User::vFileName] , @[User::vFileSpec] ,1) > 0? @[User::vFileSourcePath] + @[User::vFileName] :""
Basically, we are using FINDSTRING string function and tying it to the Boolean Operand to build the connection string. That's all.
Friday, June 3, 2011
SSIS : Export Data to a text file using a package
Open up SQL SERVER Business Intelligence Development Studio
Click on File-->New-->Project-->Integrated Services Project
sometimes "Integrated Services Project" is not visible , make sure that in the Project Types - Business Intelligence Projects is selected. Here is the screen shot.


Right click on the Connection Manager as shown below in Fig 3 and select New OLEDB Connection" This will lead you to a screen as shown in Fig 4.

This is where you will fill up all the necessary database connection as shown here in Fig 4 and click the Test Connection to make sure that you are able to connect to the database server as selected .

Now whene you hit OK in the Databse Connection manager you will see OLE DB Source object with green and red arrow in the Control Flow as seen in the Fig 5.

Now double click on the OLE DB Source Object on the Control Flow and the OLE DB Source Editor whill open up as shown below in Fig 6
Highlight the Conenction Manager on the left as you will be filling up the information to exract data from the database now.
In the OLE DB connection Manager dropdown select the Conenction Manager that was created in Step 4.
Select SQL Command in the daat Access mode. We use this mode in this example as we are using a query to get the data from the table.
In the sql Command text box write the query that you are goign to use to extract the data from the database and export out to the flat file.

Now, highlight the columns in the left that will show all the colums that your query will pull and the columns to be written out in the flat file. You can check one of the columns off if you don't want the column to be exported to the file. Leave the error output section as it is . WE are not doing anything with this section in this example.


Right click again in the Conenction Mager section and select the New Flat file Connection and thsi will pull up a Flat File Destination editor as show below.


Click on File-->New-->Project-->Integrated Services Project
sometimes "Integrated Services Project" is not visible , make sure that in the Project Types - Business Intelligence Projects is selected. Here is the screen shot.
Fig 1

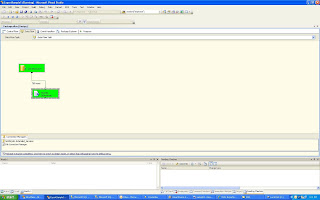
Once the project name is given (seen in Fig 1) , Drag and drop Data Flow Task from the toolbox on the Control Flow.( seen in Fig 2)
In the case of toolbox is not visible, go to View-->toolboxFig 2

Right click on the Connection Manager as shown below in Fig 3 and select New OLEDB Connection" This will lead you to a screen as shown in Fig 4.
Fig 3

This is where you will fill up all the necessary database connection as shown here in Fig 4 and click the Test Connection to make sure that you are able to connect to the database server as selected .
Fig 4

Now whene you hit OK in the Databse Connection manager you will see OLE DB Source object with green and red arrow in the Control Flow as seen in the Fig 5.
Fig 5

Now double click on the OLE DB Source Object on the Control Flow and the OLE DB Source Editor whill open up as shown below in Fig 6
Highlight the Conenction Manager on the left as you will be filling up the information to exract data from the database now.
In the OLE DB connection Manager dropdown select the Conenction Manager that was created in Step 4.
Select SQL Command in the daat Access mode. We use this mode in this example as we are using a query to get the data from the table.
In the sql Command text box write the query that you are goign to use to extract the data from the database and export out to the flat file.
Fig 6

Now, highlight the columns in the left that will show all the colums that your query will pull and the columns to be written out in the flat file. You can check one of the columns off if you don't want the column to be exported to the file. Leave the error output section as it is . WE are not doing anything with this section in this example.
Fig 7

Now from the tool box, navigate to the Data Flow Destination section and drag and drop the Flat File Destination Item in the Data Flow and expand the green arrow to connect to the Flat File Destination item as shown below picture.
Fig 8

Right click again in the Conenction Mager section and select the New Flat file Connection and thsi will pull up a Flat File Destination editor as show below.
Fig 9

Fig 10


Subscribe to:
Posts (Atom)